Thursday, December 07, 2006

All over for this time.


Back Again.


It's being a long time between posts. The whole project came rushing to an end and I didn't post for the last section due to the work involved and other commitments.


As you can see from the images we made it to the Mt. Buller for a test run of our completed projects. We had planned to go to Mt. Baw Baw but due to the dismal season and our timing there was no snow cover to speak of at Baw Baw and we had to change at the last minute to Buller. It was a great day for all and despite being tired at the end I was really happy to see everyone having a blast.


Luckily there were no really bad falls and no injuries beyond a few bumps. The board performed really well. No problem with the student projects we had some great comments from a few people.


Finally I'd like to take this opportunity to thank some of the people who were instrumental in getting this project off the ground into the classroom and up to the mountains and back.


Mary, Phil, Julie, Peter H, Russell, Jane, and Kangan Batman TAFE.


Thanks to the students and other project staff. I had a ball and learnt a whole lot.


C.


Thursday, July 13, 2006

Photo Update

Hi Folks, We have completed some of our snowboards. See photos attached.


Friday, May 12, 2006

Building completed

Here are some of the guys with the boards.

Leigh


David


Nathan


Jamie


bye c.

A lot has happened

Hi. Well a lot has happen since the last time I posted. We have pressed all except 4 of the boards and have finished at least 5 of them. That's the making of the boards, the final graphics will be a while off yet. There is some progress there also but the photos will have to wait until the real work begins.
So far the we have used the jig saw to trim the mould flash from the outside of the steel edges and then a modified belt sander, in a jig to keep the angle correct, to do the final clean up of the edges of the boards. Once this is all done the inserts are marked out in pencil and drilled/countersunk leaving the board all finished except for the graphics.

All suited up in the spray booth for the edge trimming. The cut fibreglass is really nasty so it's on with every peice of protective gear that we have.


Trimming the flash.


The edge belt sander.


Marking out for the inserts. No room for error here.


Bernie drilling the inserts.


More soon c.

Tuesday, March 28, 2006

Pressing 1

Today we pressed the first student board!!!!!!!!!! and it all went to plan. Due to timetable changes for this term we are reduced to one 4 hour session each week and this only lasts 4 weeks when the polishing section of the course begins. This means that we have a huge bottle neck at the vacuum press. We can only fit 2 boards in each pressing and each pressing takes at least 12 hours. So we are asking the students to come in after numeracy class on Tuesday to complete a second pressing with should give us 4 pressed boards per week, times 4 weeks, equal 16 boards. This should leave us with 2 extra pressings at the end. However there was a few teething problems with the first day and none got into the press. Today the class prior to ours was cancelled and only one of the students had the sense to come over and see me to see if we could start a bit early. Which we did. So at this point we are only 3 boards behind. Arghh!

So what did we get done.

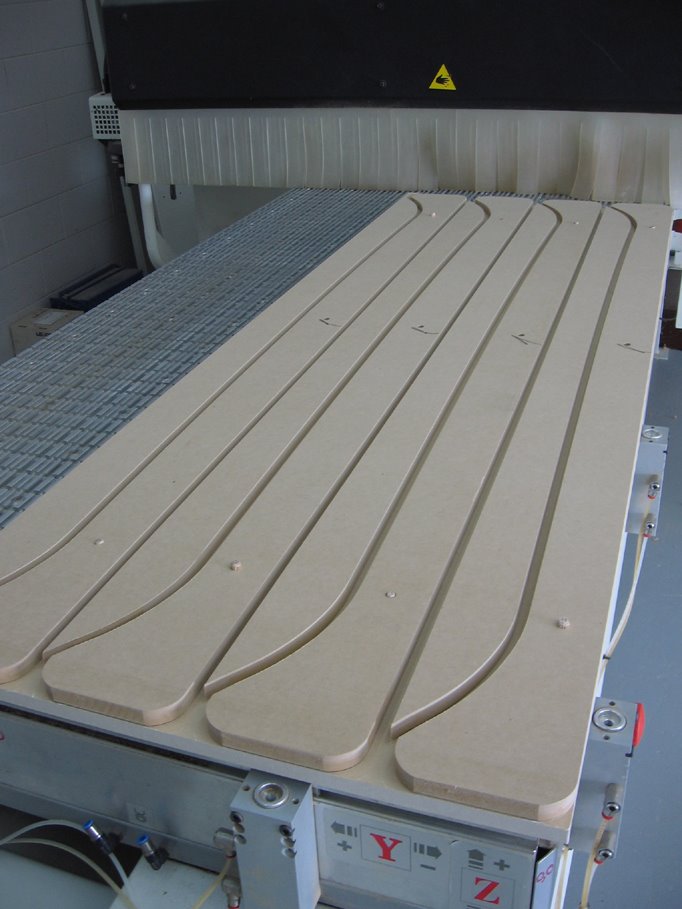
Over the break in a bit of a eureka moment I worked out how to machine the jigs as a single block. This means that it is much simpler to make them and therefore I’m planning 2 of each size. The jigs are now a 345x90mm block 100mm longer than the boards made up by laminating 90x45 pine studs. The block is mounted and machined to shape then faced with 4mm MDF to give a hard smooth surface.

Machining a new jig.


First off we machine the base and the core.


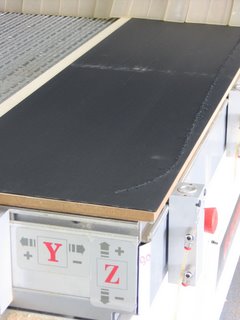
Then the base is fixed into the jig with double sided tape.


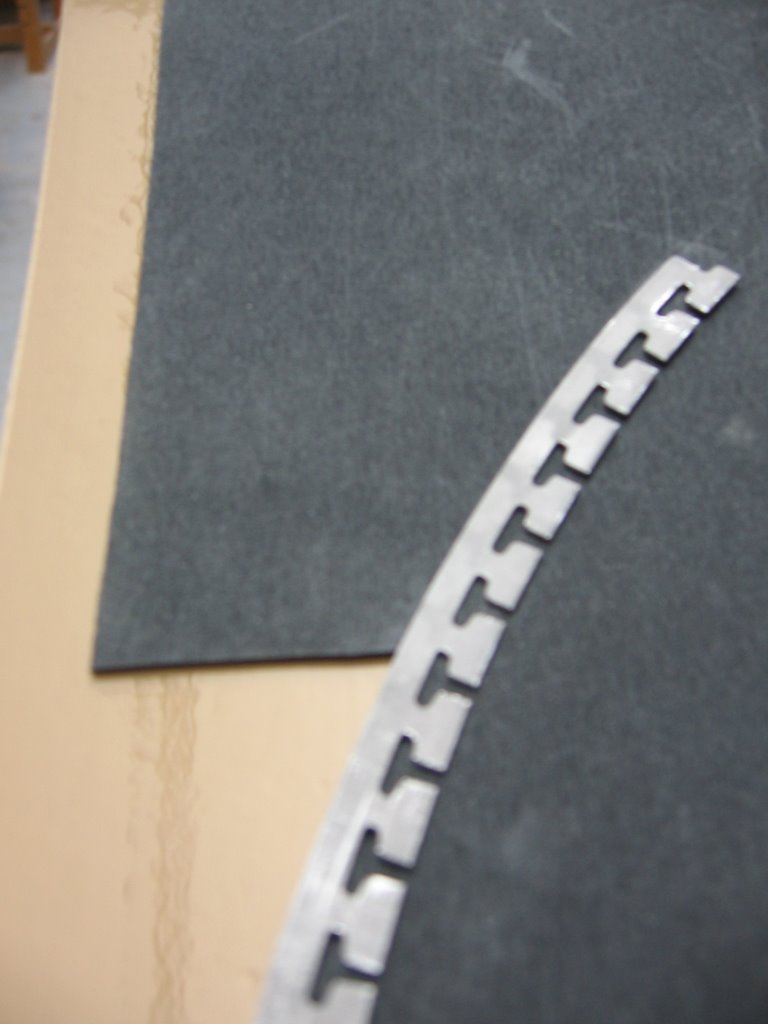
The edges are now fitted to the base using the slots at each end to fit the end of the edges into and 12mm brads along the edges to hold them in place in the jig. The edges are tacked every 200mm with super glue to make sure they don’t lift during the lay up.


Setup ready to begin laying up. Note the breather cloth taped to the edge to help prevent the build up along the edges of extra resin.


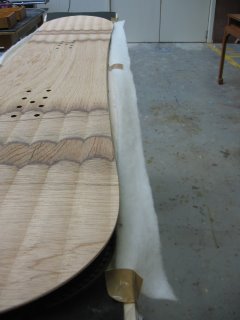
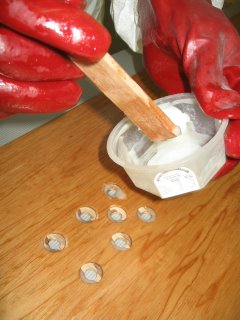
Now it's on with the protective gear and begin mixing. The resin is mixed in 2 batches to help stop exothermic reaction occurring. Each batch is 420 grams. Down from 500 in the prototype and could be less still. Maybe as little as 360.


Each layer/surface to be joined is skimmed with resin and the cloth is wetted out fully. (Completely soaked through with the resin). The base and first layer of cloth is spread first then the extra edge tape is placed onto the jig and wetted out. We used the thicken resin to fill the voids in the edges.


The cloth is split around the locating inserts and rolled down to make sure there is good wetting between base and cloth.


The core is spread with resin and the thickened resin used to locate the inserts in the core. Once in place the top of the cores is spread with resin ready to take the top glass cloth and the top sheet.


Once the position of the parts is OK each end is taped to stop it moving in the bag and the whole jig and lay up is put in the bag and vacuumed down.


Cleanup and wait until tomorrow for de-moulding.


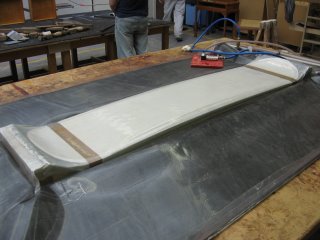
Thanks for checking in. c.


Go Go Go

Hi.
It's been a while and there is lots to tell. We have just had 2 weeks with no students and during that time I made a prototype to test and refine the process and check the completed product. On the whole all went to plan and there will only be small tweeks to the process that I had planned.
The prototype came out well! There was a bit of a problem with the resin building up at each edge but I was able to squeeze most of that out with a veneer 'hammer' whilst the board was in the vacuum press. In the next ones we are using less resin and a rubber squeegee to spread the glue (Phill from Polymer Engineering suggested this and a couple of other changes. Thanks Phill.) I have also added an extra insert to be used to align the core and the base during the lay up. This is machined in the core in the usual way then super glued to the base before laying up. The insert, now fixed to the base, is used to align the 2 parts during lay up to ensure that there is no exposed timber in the completed board. Which could happen if the core is misaligned. We are also using some micro bollons mixed into the resin for the egdes to help fill the voids formed by the tangs on the edges.


This is the prototype in the press.

Thursday, March 09, 2006

Jigging up

Monday 6-3-2006 Today we started the manufacture of our snowboards in earnest. The first of the jigs was cut out on the CNC. But only after a couple of false starts. One of the first things that we did in my teacher training was to go over and over the importance of making sure that you are prepared for the class. Well, clever clogs here did not 'live' test the programming for the jig profiles and after preparing the panels, going through the boot up and operation of the CNC with the students I let everyone down when the programming failed. After much head scratching and some frantic phone calls the problem was fixed and we got to work. Apparently there are some little tricks to applying tooling radius correction to DXF generated tool paths. In the end I remembered the same thing from a past job and changed the tool to one with a smaller radius and it all went fine.
The photo below has Dave and Oz inserting dowels to make sure that the job does not move when machining. We are using the vacuum to hold down the job but as we are using unsealed MDF there was a bit of slippage. I already had dowel holes in the profiles to align them for laminating. These were drilled into the sacrificial sheet and short dowels inserted through the profile into the sacrificial sheet. This coupled with the vacuum did the trick.


This is the profiles completed on the bed waiting to be removed. Dowels can be seen in the profiles.


Jamie and Corey checking our sample board with the first batch of profiles.


The profiles are now glued together to make up the completed jig for vacuum pressing of the boards. Next week I plan to run the first (prototype) board using the jig. This is to allow me to check the planned process (remember - be prepared) and to test the core thicknesses/board stiffness performance. After the first one is fully cured I'm going to test the lateral and torsional stiffness against a few borrowed 'good' boards. If it is all in the same region then we are set to go for the student boards.

Monday, March 06, 2006

Desigining the Boards

snoCAD

This is a week late. No photos from today (Monday 27 February) as I forgot to take the camera. But we have some great video that I’ll post when I get it back from the AV production guys.

This was the second group to do the designs for their boards using snoCAD. We made good progress until lunch time when there was a general testing of the rules with all but 1 of the students returning late and facing exclusion from the rest of the class. All of the students have been informed of the rules and this has being reinforced at each break. However there is always a bit of testing occurring about this time of year when the students begin to feel more comfortable in their environment and begin test the boundaries. Each time this occurs we stick to our guns, follow the procedures and adjust the lesson plan to try to catch up next class when we start off with a clean sheet.

This gets a bit disappointing because I can see that there are things that need to get done now if this whole project is to arrive where it should in September. I’ve explained this and given out a timeline but it is just toooooo far away for these guys to get.

So before all this happened the Yellow team had completed the overall designs and made the DXF files. The DXF processing takes a while so we aim to do this over lunch break. Some of the boards are looking good and I’m hoping to do some swapping about and testing of the different designs when we get to the snow. There will be only 3 different lengths but a whole bunch of other ideas going on within this.


One of the student boards based on a 153cm length.

We also made a start on the jigs. These are a female former for vacuum bagging the boards. They will be made up of 20 odd MDF profiles laminated together. Using the CNC we’ll cut them out and then glue and laminate.

Using snoCAD we designed a very thin board with the sort of profile that we want for the boards. Once the DXF file is made we discard the top half and complete the shape using Xilog+ ready for machining.

Next week we are machining the jigs. More then.


Using snoCAD for the jig.

Finally a big thanks to Dan from graf snowboards for permision to use their snoCAD software. Without this I don't think we would be able to run this project. Thanks. www.grafsnowboards.com

c.


CATIA - Day 1


Today, Wednesday 1/3/06, the students began some 3D modelling on CATIA. There will not be much time to really get this into the board design as most of that has being done using the snoCAD software. The CATIA software will give the students the chance to see what a really good CAD/CAM package can create and how seamlessly it all works.
This is Ismail deeply involved in modelling of some snowboard binding parts.


Here is everyone, well almost everyone. From the left we have David, Jamie, Is, Phil Bovis (Teacher), Oz, Nathan, Donald and Bernie’s foot.

All hard at work using CATIA for some 3D modelling.

Saturday, February 25, 2006

Week 1 and 2

It's been a while but all is well.

We have split the class of 15 into 2 groups for the first stage. This is for a number of reasons but mostly to allow close supervison of the studnets and their developing class interactions and to ensure that there is positive development for each of the studnets. In previous years this cohort has come to us with a range of 'issues' and we are using the split classes to help get these into perspective and get on with the work that we are supposed to be doing.
As we progress through the tasks the membership of the 2 teams will be 'adjusted' to balance the personalities and to get the most producitvity for the students.

This week (Week 2) I was off work for 3 days so not much happened on the board front. The studnets worked on the other bits of their course. The order for the materials was placed and futher work on the sponsorship arrangments was all.

Last week (Week 1) we kicked off with the whole group measuring themselves and recording this information so that the design of the boards could be undertaken using snoCAD. Once this was completed the class was split into the 2 groups. Green and Yellow teams.

Team Green went to the PC lab and completed the board design (not the graphics) from here we will convert these to tool paths for CNC machining of the cores and bases. Team Yellow will be doing the same on Monday and I'm hoping that there will be some real interest from this group in the design of the boards. The greenies did a great job with the board design and there are some fine boards that will be coming out of the press soon.

Everything else is falling into place and it is beginning to look like the whole thing might really go off with a bang. There is considerable interest from the other studnets who have noticed the preparations that are occuring in Building F and it has me thinking that this could become something that is rolled over into an ongoing course. Annual snowboard trip and a new board each year, sounds like fun to me.

Plans are in place to press the first board during the coming term break so the first completed board is only a few weeks away.

Will post with images from the yellow design work next week.

c.